Monday 23 February 2009

Latex head!

I'm soooo pleased - I wasn't expecting it to come out near perfect, but it did! There are a couple of air bubbles, the most noticable one on the eye, but other then that - just how I wanted it!

Photobucket
Photobucket

What I did while the mask was still in the mold, and I'd only put on a couple of layers was line it with thin alluminium wire, in different angles so it would keep it's shape. This was really good 'cause now I can change the shape of his head, for looks and animation!

More to come!

Marnik

Sunday 22 February 2009

YAAAAAAAAY!

Yay! The mold worked - or at least I think it did...I'll have to see how the latex mask comes out!
Photobucket
I've already started layering latex.

Marnik

Saturday 21 February 2009

Plaster of paris mold made!

Photobucket
This was my first ever try, so fingers crossed it works okay!

Marnik

Thursday 19 February 2009

Beginnings of a head for the baron!

My plan is to make a plaster mold of a plasticine head, make a latex mask in the mold and make an armature for the head.
Photobucket
I havn't yet got any plaster, and before I do, I just thought I would check 'plaster of paris' is the right thing to get....?

Thanks!

Marnik

Wednesday 18 February 2009

Finished the church - yeah!

Painting the roof:
Photobucket
And here it is all stuck together and finished:
Photobucket
(sorry if the photo's are abit distorted, my PC's gone weird!)
Well, I say finished...I still need to make 3 steps underneath out of wood, but I've got other stuff that needs doing before then, so that might be a while...

Marnik

Tuesday 17 February 2009

More on the church!

Yesterday I made the tower bit on top. Here are the 6 pieces cut out:
Photobucket
And here they are stuck together. I used hot glue and taped over all the edges to make it nicer:
Photobucket
Next I had to make the onion dome. For several reasons, I realised this wasn't going to work, or it would be extremely hard, so instead I made a tiled dome:
Photobucket
And here is it all put together so far. The tower is not glued on:
Photobucket
I also painted the doors, and added knobs made of epoxy-putty, and cardboard crosses. Here is the whole thing (other then the roofs) with its first coat of paint:
Photobucket


Lately I've been noticing that my views have gone down - if anyone's reading this please comment and get other people to come along and join the fun :D

Thanks for looking!


Marnik

Monday 16 February 2009

More progress on the church!

So I made the main roof and the one above the front door out of wood, then tiled over it with cardboard.
Photobucket
Photobucket
Photobucket
Photobucket
Here it is all constructed so far, all the bits glued together with hot glue.
Photobucket
I made some hinges for the doors, out of cardboard with alluminium wire stuck on top. I hot-glued these to the inside of the doors. They work pretty well, 'cause they are animateableableable(?).

Today I will try and work on the spire.

Marnik

Sunday 15 February 2009

Beginnings of a church set

So the first set I am building for this project is a Russian church. Here was my origanal design:
Photobucket
And here is what I've done so far:
Photobucket
Photobucket
The two doors have not been glued in, I will come up with something so they are able to open.
I am going to spend a good few hours cutting out many many squares now to make the tiles for the roof.
At some point I'm gunna have to come up with how to make the 'onion' on top look right. Also, I'll have to make at least 3 steps all the way around, underneath the church itself.

Marnik

Finished the horse!

Photobucket

The bits on the eyes are called blinkers, horses that pull stuff wear them - just to let you know theyre not some *FAILED* attempt at eyes. This horse will be pulling the baron in a russian sleigh, which I've built half of already. It will be made of FIMO clay, 'cause I now have loads of really nice colours, although I need some more so I'll have to wait untill we next go to town.

Marnik

Saturday 14 February 2009

Baron von Munchhausen

Okay, I told you I'd explain it, so here we go:

For christmas, my grandma got me (and all my cousins) a wonderful, thoughtfull present. It wasn't just a book, it was an old, forgotten story of Baron von Munchhausen. Now she knew these stories scince she was young, but they were all in german, so she had to personally translate them. To add to that, she made them into proper books, with ingraved hard covers, and even a personal message to each person inside! In the origanal books, there were black and white pictures, which, for us, my grandma photoshopped colour into them - wonderful!

Anyway, these stories now feel very close and dear to me, and I deffinately think I should create something in return. What better then to animate the stories! Each one is funny, wild and adventurous.

They are set in the 1700's, of an extrordanary man on his travels from Germany to Russia. I'm sure they'll be very fun to animate!

Here are a couple of exerpts from different parts of the story, with pictures:

Photobucket
Photobucket

Here I am not showing you any of the craaaaazy stuff he does, as I don't want to give much away before animation!

For the snow which is in most of it, I will use lots and lots of white newplast plasticine. This is so I can create footsteps in it, and also as there is a sequence that plasticine will be perfect for the snow!

There is also a small russian church near the begginning, which I have started making today out of wood. I will glue gun the bits together, and cover it in clay.


*******


In other news, I have put lots of layers of paint on the horse:
Photobucket
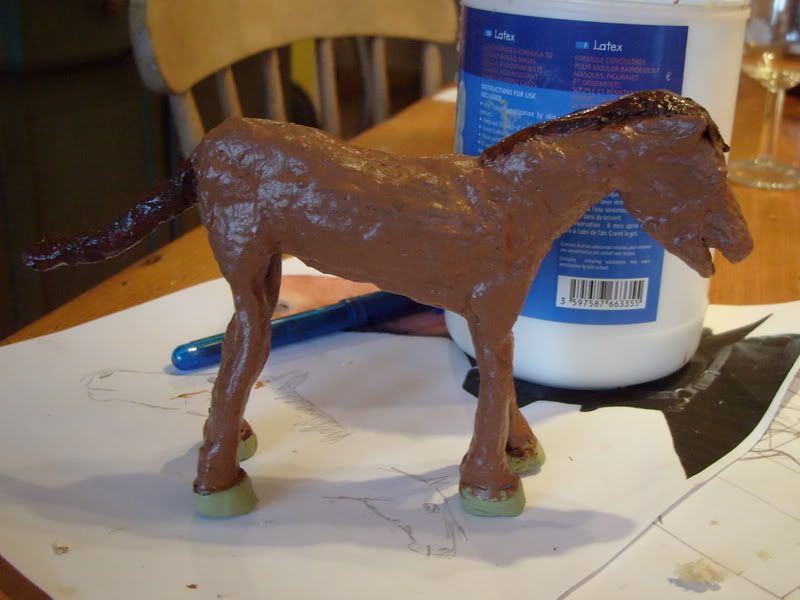
The paint is just acrylic mixed with latex. If I had more money I would use PAX paint, although latex and acrylic works fine!
I still need to paint the hooves!


Marnik

Monday 9 February 2009

More progress with the horse!

I've added lots of layers now and overall it looks pretty cool, baring in mind it was my first proper go at the build up technique! The head is too big and the legs don't look right, but other then that it's alright!
Photobucket
Photobucket
Photobucket

I still need to add more mane (tissue paper and latex) and then I can get on with painting him. In the book illustrations he is brown, so I'll go ahead with that!

Marnik

Sunday 8 February 2009

Horses head!

Hey,

I take back what I said about the head in my last post - and went back to the origanal idea of using latex and tissue to build up the head.
Okay so I admit it doesn't look like a horse, but at least I can animate it and it will fit in with the rest of the body...

Photobucket


Photobucket

Tonight I'm gunna try and thin down the neck, add a mane and give the whole horse a new coat of liquid latex.

More to come!!!!!

Marnik

Munchhausen's horse

Hey guys,

For the Baron's horse, I decided to go for something that I hadn't done much of before, the Latex build-up technique. This is where you make the armature, and cover it with foam/sponge, and build up, as if creating muscles. Once you are finished building up with foam you cover the whole thing with liquid latex, in thin layers. This technique was used on all classic stop motion monsters and dinosaurs.

Here are some progress pics:


Photobucket

The horse just required a simple armature, with a tie-down in every foot.

Photobucket

Building up the foam. Up to this point I stuck everything on with hot glue and epoxy.

Photobucket

Now I needed to glue bits that would have to move. I used Latex for this.

Photobucket

The first layer of latex with epoxy hoofs and head now stuck on.

Next, I need to make the head. I started a forum post about this here.

THE CONCLUSION:

What I think I will do is use something along the lines of making the inside of the head out of plastic and wire, to lighten it up abit, and then sculpt it out of something hard, but for the bottom jaw, just leave some wire sticking out. I will then sculpt the bottom jaw with latex and tissue, so that it will be the only moving part of the head - I think that would work!

I will have to give this a go some point today, I'll keep you imformed!

Marnik

Saturday 7 February 2009

Finished body

Here are some better pictures of the body - now finished.
Photobucket
Photobucket
Photobucket
I added a half-belt, a collar and some other small details.

Marnik

Friday 6 February 2009

Baron von Munchhausen puppet fabrication

Hey guys,

If I wasn't rather busy right now I'd explain the whole origan of the idea of Baron von Munchhausen, the story and why I'd like to animate it. But I will explain. One day. Hopefully...

So today I made his body, he's a baron from the 1700's so he needs to look smart and posh. I've been designing him many times and my most rescent design seemed to fit the character perfectly, so I went along with that one. Unfortunately, my camera batteries are flat, so for todays post I have to use my rubbish one.

This puppet was more trial-and-error sort of thing, so I didn't make it a particuarly nice armature, but it worked fine.
Photobucket

I then used a very simple version of the build up technique, just with felt and foamy dish cloths to fill out the stomach. I glued it on with a strong plastic glue, which appears to be pretty much the same as epoxy, except without the two parts and dries alot quicker - perfect!
Photobucket

Once I'd finished all the felt fabrication, I added on little details, the sort of thing a Baron would have worn. The main bits are just string with gold paint, glued down. The rope from his chest to shoulder was made from lots of pieces of small alluminium wire rolled up together. The shoulder things are just cardboard painted gold with wire drooping down. As I didn't put tie-downs in the feet (which I now very much regret) I had to make the boots out of something that would stick to the set floor. The only thing I could think of was plasticine - which I had lots of lying around, so I went for it. They doesn't look great and I may well change them, but they'll do for now!
Photobucket
I'm really sorry about the quality - i will upload much better pictures tommorow!

It's not quite finished - it will need a bit more work!

Also, I did a walking test of him, comment if you want to see it!

Marnik

Sunday 1 February 2009

2d animation tests


First a man walking, then a cat running. These were my first ever proper tests at 2d animation. I used the Animator's survival kit as a reference.

I've got looooads of stop motion related stuff I will probably show you some time soon, so hopefully you'll be seeing more of my blog!

Marnik